In Hydromagic, it is possible to add comments or labels to your maps. You can use comments or labels to, for instance, mark places, or to add extra text to the map before sending it to a printer or plotter. You can place comments using any color or Windows font, with or without background color.
Comments can also be exported to AutoCAD DXF or Google Earth KML together with the other project items using either the "Export AutoCAD DXF" or "Export KML" tools.

Example of a customized comment as map overlay.
There are multiple ways to add a comment. You can create one manually from the "Comment Manager", or click on the map to place a comment at the current mouse position. The easiest way is by clicking on the map. Zoom and pan over the map until you find the position you want to place a comment. Click the right mouse button, when pointing the mouse to the position, and select the "Add Comment..." option:
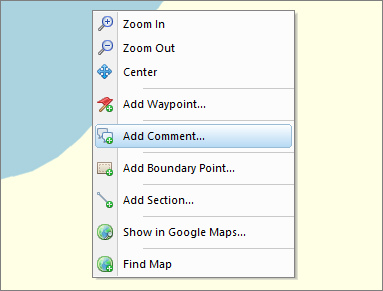
Right click the map and select the "Add Comment..."
option to place a new comment.
You will notice that the position of the comment is already filled out. In this window, you can add a comment to store with the project. You can also change the fore- and background colors and the font used to draw the comment on the map. In the preview area you can see an example of how your comment is going to display based upon the currently selected font name, font size and color settings.
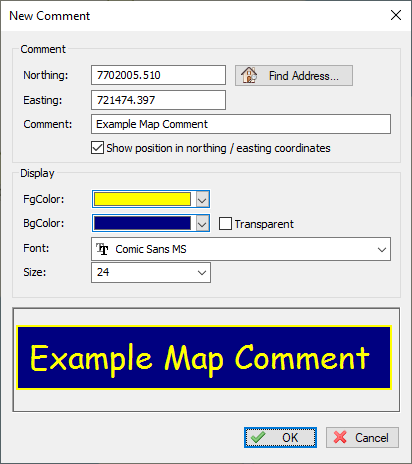
Customize how the comment will look in the "New Comment" tool.
To modify a comment after it has been placed on the map, select the comment with the mouse (the mouse cursor should change from arrow to hand) and click the right mouse button, and select "Edit Comment..." as shown below. You will be able to alter all it's properties including the comment location. To remove a comment from your map, you can select the "Remove Comment..." option from the menu instead.
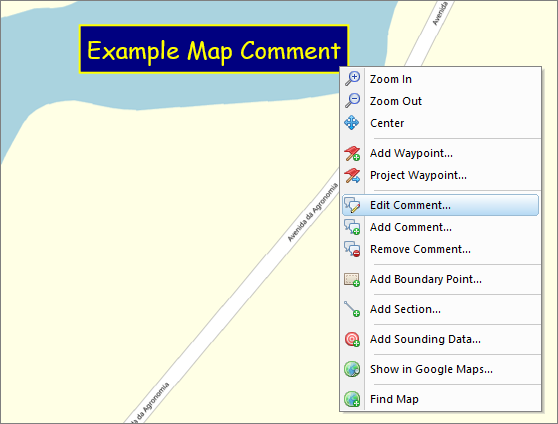
Select the "Edit Comment..." option to modify an existing comment.
To move a comment, you can modify a comment's coordinates manually as described above, or you can use the mouse to drag the comment to its new position: Select the comment with the mouse, click and hold the left mouse button and drag the comment to its new location. If you accidentally move a comment to an incorrect position, just select the "Undo" function by pressing "Ctrl-Z" on your keyboard.
Each comment that is part of your project, can be found in the "Project Explorer" view. When the "Project Explorer" is not visible, you can show it by selecting the "Project Explorer" option from the "View" menu at the top of the screen. The comments will be displayed when expanding the "Comments" folder in the project tree. You can right-click a comment to show more option, or double-click it to center the map on a comment position.
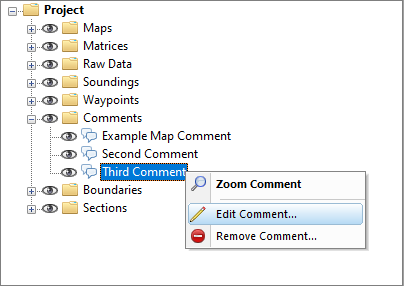
Comments can be accessed from the "Project Explorer" view as well.
To view a list off all the comments in your project, you can open the "Comment Manager", by right clicking the "Comments" folder in the "Project Explorer" and selecting the "Manage Comments..." option. It can be used to toggle the visibility of multiple comments at once, or to delete a selection of comments.
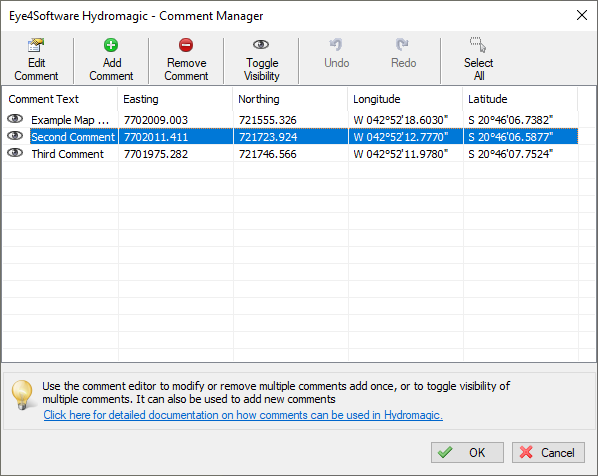
The "Comment Manager" allows you to perform operations on multiple comments at once.