Since Hydromagic Survey version 9.1, it is possible to import sidescan sonar data from recreational sidescan sonar units like Lowrance. Lowrance side scan sonar data can be recorded in a single file with the "SL2" extension. In the near future, Hydromagic is going to support "SLG" and "SL3" file import as well.
Before you import sidescan data, make sure a project has been created or loaded with the correct map projection. If the map projection isn't suitable for the selected side scan data files, the import process will result in distorted images.
To start the sidescan data import wizard, locate the "Sidescan Files" folder in the "Project Explorer" and right-click the folder with the mouse. From the context menu which appears, please select the "Import Data Wizard..." option as shown in the screenshot below:

Select the "Import Data Wizard..." option to import sidescan data
into your Hydromagic Survey project.
Hydromagic is able to import various sidescan data formats, including:
Since this manual page in on how to import data from Lowrance units, we select the "Lowrance Sonar Files (*.sl2)" option in the first page of the data import wizard. When selected, click the "Next" button to continue to the next page were we are going to select the files to be imported.

Select the "Lowrance Sonar Files (*.sl2)" option from the drop down list.
To select the files to import, you have to select in which folder they are copied. This can be done by clicking the "Browse..." button. After selecting the folder, click "OK", and Hydromagic will automatically scan for Lowrance SL2 files and shows them in the list:
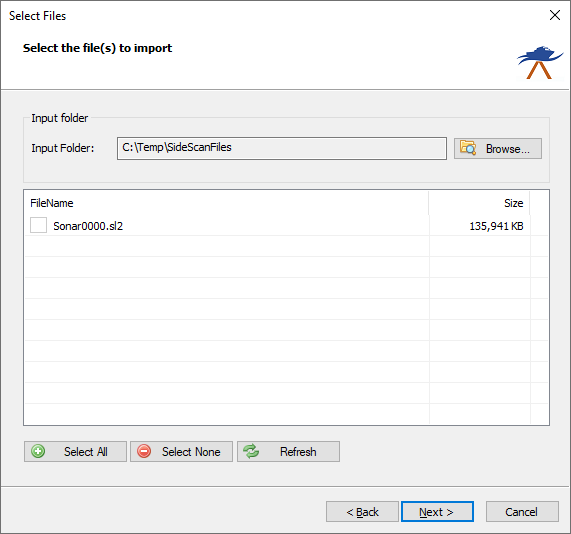
Select the files to be imported by checking the check boxes.
Select the files you wish to import into your Hydromagic Survey project by checking the check boxes in front of the file names. To import all files at once, simply click the "Select All" button. When selection has completed, click the "Next" button to go to the next page of the wizard where we are going to adjust the import settings.
Please take some time to review the settings in the "Sidescan Import Options" page. Once set correctly, the values will be stored for the next time you use the wizard. Especially the sound velocity setting is imported, since an incorrect setting may cause objects to display closer or further from the vessel then they are.
The sound velocity is needed to calculate the range from the number of samples. Using an invalid range can cause objects to appear closer or further from the vessel then they are actually are. Depending on the selected units, you have to specify the sound velocity in either meters per second or feet per second. When unsure, use the default 1500 meters per second value.
Use this option to specify the number of return signal samples will be processed by the software. You can use this setting to avoid overlapping sidescan images. When a value of zero has been entered, this setting will be ignored and all samples are processed and converted to image pixels.
The filter can be used to filter noise from the sidescan data. A couple of filters can be selected to process the data:
Feel free to experiment with the filter setting to see what is working the best for your data. When you want to make sure objects aren't affected by filtering, select the "Disabled" option. This will cause the wizard to skip data filtering when importing sidescan data.
With the clipping option, you can select a boundary to clip the resulting sidescan image overlay. All pixels not within the boundary won't be calculated. Click the "Select..." button to select one or more (islands can be defined) boundaries, or ignore this setting to import all data.

The "Sidescan Import Options" page can be used to customize some settings
before importing sidescan data.
For some files, additional gain settings need to be set to get the same color intensity for pixels as the distance from the nadir increases. You can set a time varying gain (10logR, 20logR, 30logR or 40logR) to compensate spreading loss, as well as a correction factor for attenuation of return signals due to sound absorption in the water.
After some experimenting it seems that 20logR seems to give the best results for Lowrance sonar units. If not, just experiment with the different settings. To calculate the theoretical sound absorption in decibel per meter, you can click "Calculate..." to launch the sound absorption calculator. You have to copy and paste the the decibel per meter value into the wizard.
After adjusting the gain settings, please click "Next" to go to the last page of this wizard.
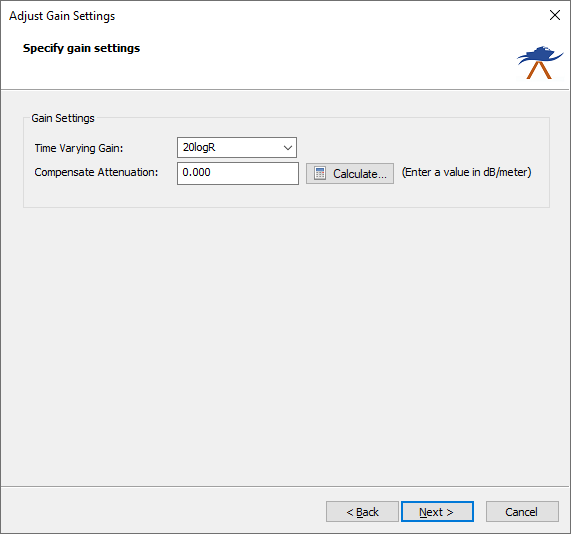
The gain settings can be used to correct the sidescan image for
spreading and sound absorption losses.
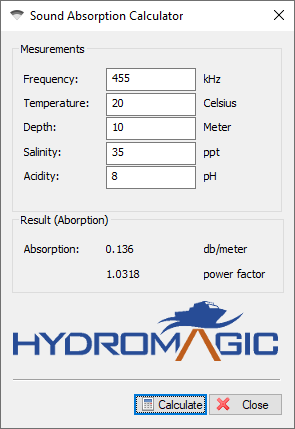
The "Sound Absorption Calculator" can be
used to calculate the attenuation value.
After selecting the data format, files, import and gain settings, you can click "Finish" to start the import process. A progress window will show the importing progress of for the selected sidescan files. In case of problems, make sure you always check the "Processing" tab of the real time activity view pane.
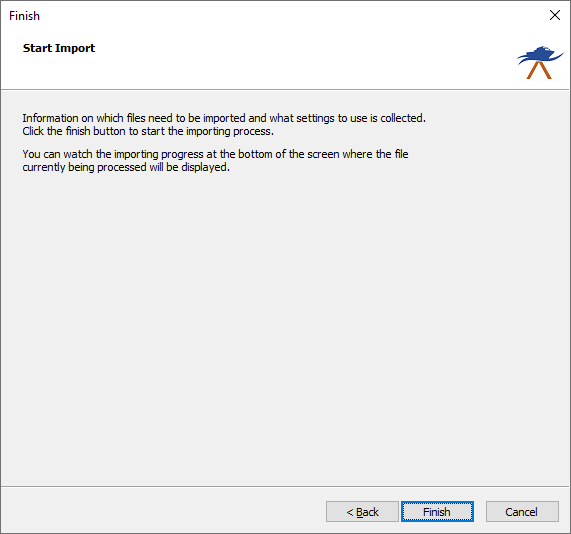
Click the "Finish" button of the last wizard page to start the data import.
When all files have been processed, they will appear in the project manager, and as map overlays in the map display window. To change the color schema for the images, right click the "Sidescan Files" folder in the "Project Manager" and select the "Sidescan Options..." menu item.
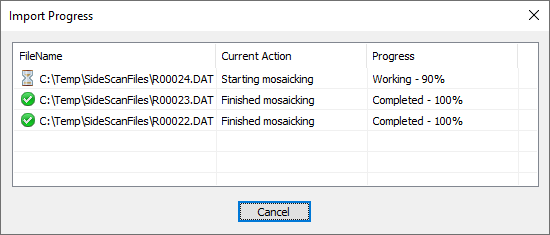
A progress window will show the progress of the importing process.